Showing posts with label shabby. Show all posts

Monday, April 9, 2012

My Shabby Home

I was home alone the other day for the first time in ages! Every since my husband retired and my 22 yr old son moved back home, being alone just doesn't seem to happen often. So I turned up the radio loud and just did my own thing, and alone! Well the dog and cat were here but they don't count. I actually enjoy them being around, lol! Don't get me wrong, I enjoy my husband and son too; but hey we all need some alone time!


Anyway, I took advantage of the situation and took some pictures of my home and some of my most loved treasures. My style is Shabby, although not what I would call "Chic." It's just my style and is ME. Most everything has come from estate/yard sales, hand make gifts from my kids, thrift stores and sometimes Amazon or Ebay. Take a look!

My Kitchen Window. Notice the vintage Colanders. I have a thing for old Colanders and can't leave one behind if found. The blue pottery was made by my son and is a cherished FAV! I'm also have an avocado rooting in a sugar cup. And of course Flamingos!!

Top of the fridge. Vintage jar, old baby weight basket which came from my Mom's collection of vintage, and a vintage mixing bowl. I also have a thing for those too and will bring them home even if they have damage...it's a sickness.

Kitchen wall with various treasures. Mosaic spoon holder by ME as well as the top of the blue cabinet.

I love this old doll head!! She had a huge hole on her head so I glued on the rose. This also came from my Mom.

Kitchen wall on way out. The surfer art by my son when he was 10 or ll.


This vintage hutch sits in the room off the kitchen...it's our "catch all" room, my mosaic room, and the pet eating place. It's the one room in this house we never got around to tearing down the wallpaper,. (this house was wall to wall wallpaper when we bought it) The painting on the top is my Mom, painted when she was maybe in her 20's, if that. Here sits some of my mixing bowls, a palm tree pencil painting by my son, various other things and the cats food and water.


The wall in our "office". This room was really to be used as the dining room but this is where we have the computer, printer and fax. We eat in the kitchen and/or in the living room. We are classy like that. The dog bowl with the greenery belonged to our now deceased Black Lab, John John.
Mosaic table, again made by me, next to the computer desk.
Now we are in the living room. I've had this old trunk forever!  My aunt restored it for me when I was just a teen and I have hauled it around all these years. (I'm now 51)  The green pitcher is a vintage "Hall" and the two babies pottery piece is from an Art's Fair. It reminds me of my two boys at that age.
Our coffee table...it's an old 2 sitter school desk. My Mom gave this to my boys when they were little for a play table. My husband wants to refinish it but I'm not sure? It just has so much history in it! This also doubles as my husband's "office".

I also have a thing for these vintage lamps as you will see as we move on. The swan painting was found at a yard sale for 1 buck. The peace sign is another of my mosaics.

My FAV thrift store find! I just love, love this painting!
Highwaymen artist AL Black's version of  "Eddie's Place". Read more about Eddie's Place here..
Another vintage lamp! This one with mosaic. The drawing is of JohnJohn and I bought it for husband on Ebay's Charity Drive for Hurricane Katrina. The little frog is vintage McCoy.

Love this watercolor of dogs! The black one reminds me of JohnJohn. Another thrift store find.

Another mosaic table I made. The little vintage flapper girl sits in a teacup on a old lamp base. The pillow, a thrift find, looks like the flapper so I paired them together.

Mermaid window decal on sliding door to the pool area.

This is the hallway between the bedrooms. The vintage medical cabinet was from my Mom. The 2 paintings on the wall were done by my kids. (sorry they didn't photo well). 


Hallway bath...and yes, that is the trash can hanging on the wall. I try to pick my battles with the puppy.


Another Highwaymen painting; this one is Johnny Daniels. The painted signs were both yard sale and thrift finds.

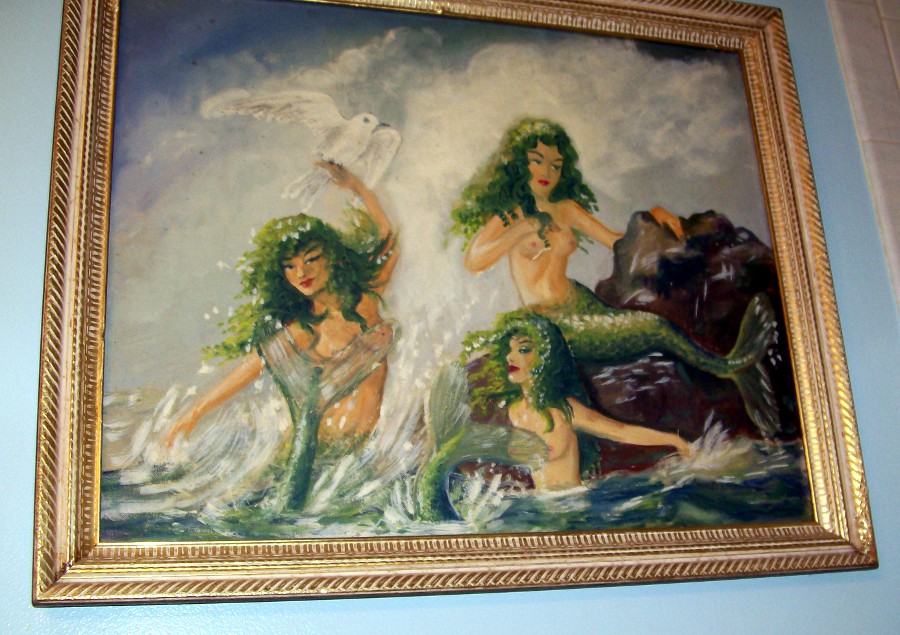
Still in the bathroom...this awesome Mermaid painting was an estate find. It wasn't framed and I paid a whole buck for it!! It's a real conversation piece!

Our bedroom. Okay, this may look very un-classy but for me it's VERY special! This is my memorial to our JohnJohn. He was 12 when he passed, and alone in the backyard. NOT because he lived outside but because he had doggy doors to come and go. He went out to "go" and never made it back in. It BROKE my heart into a trillion pieces!! We knew he was ill but he was being treated and doing soooo much better. It was just so sudden. I tied together all his bandannas together (and yes, he wore every one of these at one time or another. They usually hang all the way to the floor but Dane, the new puppy, has gotten interested and so I pulled them higher to keep him from them.)  And his collar is hanging on the Door Crown above the bed. I slept with that collar for months! And yes, the bed is on the floor with no bed frame. Also because of JJ. He had two knee surgeries back to back when he was 6 yrs old and we took the frame off so he could get up and down on the bed. Yeah we are crazy in love with our dogs like that. :)


An old drop leaf table with mosaics. The cross stitch pillow on top was an unfinished piece I found at a thrift. I finished it up and made into a pillow.

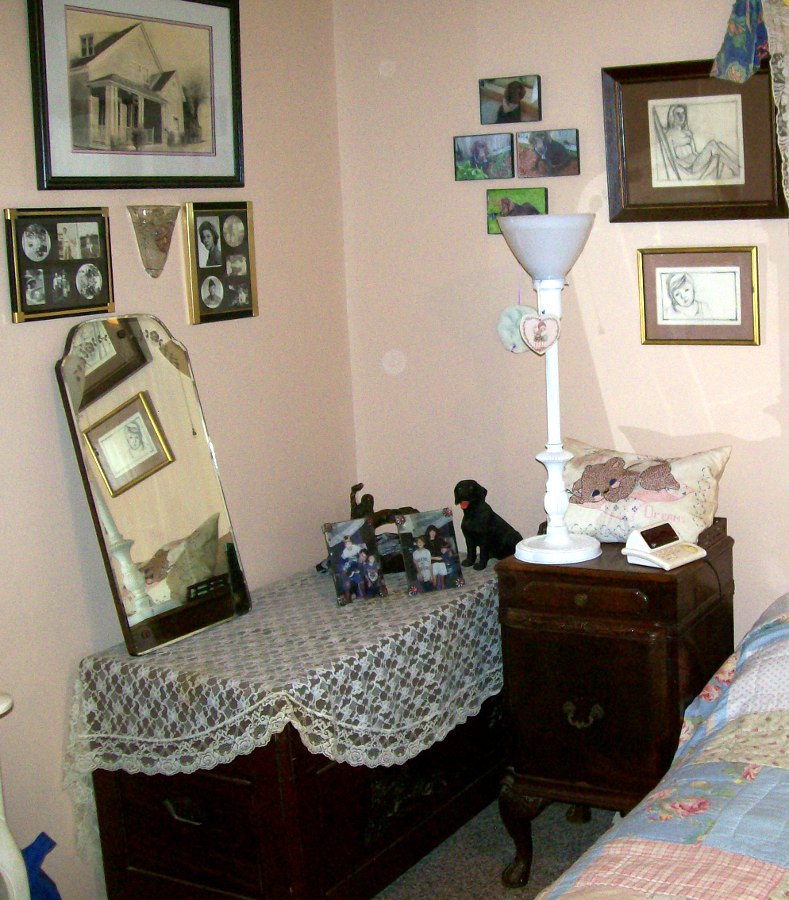
Also in our bedroom. Notice yet another vintage lamp. The house drawing is of my Mom's house, a Victorian in Mobile, AL.. The other two drawings are of my Mom and me, back when I was maybe 3 and living in NY. Of course I have lots of puppy Dane pictures also.

So wow, guess that is it!!! Hope you've enjoyed looking around! If you are here, and have a blog, please post a link so I can visit. Better yet, join my blog!!! I'll be back later with a before and after post of my vintage concrete flamingo that my dear husband did for me. He was after all the one who broke it! Come back to hear that story!

Monday, April 2, 2012

Broken China Mosaics (Part 3)

This post is part 3 and the final post on Broken China Mosaics. If you haven't read them yet, go here Broken China Mosaics (Part 1) and here Broken China Mosaics (Part 2).

Now I'm going to show how I use thinset (also called Mastic) to make the cut china tiles level.

First I use a wood craft stick to scoop out some thinset into a clean plastic container. Then seal up tightly the bucket of thinset so it won't try out. I buy the very large size but many sizes are available on Amazon and/or home improvement stores.

Notice how much thicker the center piece is to the surrounding tiles.


Here is another example with a thick center next to stained glass. Stained glass works great along side broken china and is great for filler. But it is way thinner.


Here is a good example for placement of the tiles. For the most part I lay out my entire (or most) of my design before gluing down. That way I can work with the varying thickness better. But if glued down and I find one misplaced, it's easy enough to pull it up and replace it.


Now apply the thinset using a wood craft stick.


Place the tile with the thinset up close, about the width of the craft stick and work it down to be level with the center tile. If you don't have enough, add more. If you have to much, clean the acess with a toothpick. You don't want to push it down to hard but hard enough that it is set on your surface. Continue this way through the rest of the project!


See how the tile is pretty flush with the center?


And that's how it is done! Pretty easy once you get the hang of it!

Once the tiles are completely glued on, I wait at least 3 days before grouting. Thinset is thick and may take awhile to dry. Test a few pieces to make sure they are on totally dry.

Next is a step that many skip but I recommend:  Use a Dremel with a sanding drum or a diamond bit to smooth the edges of the china pieces. I do this before I grout although sometimes I get so excited to grout that I forget and do it after. Works either way but if it's grouted you just have to be extra careful not to nick the grout.

Time to grout! For the most part I use Sanded grout that I mix myself. But you can also buy Premixed Grout. My color choice is white but that decision is based on the fact my projects are mostly "shabby" and white looks the best.

Okay, I'm going to cheat a bit here and direct you to another site for the grouting directions.

I hope the information here was helpful. Please add any comments and feel free to ask any questions!

And if you haven't already done so, take a look at some of my Mosaics!

Friday, March 30, 2012

Broken China Mosaics (Part 2)

Okay, now it's time to start  cutting the china into pieces with the wheeled nipper.

If you are here for the first time, scroll down to see Broken China Mosaics (Part 1)

The coolest thing about these nippers is that you can cut out the design the way you want it. You have the control that you just don't get with other cutters.


The above photo shows how you can place the wheels in the white space between the patterns.


I've made the first cut (above) as you can see in the bottom of the pan. I cut it large and will continue cutting large cuts until I get off all of the rim. Then I will discard what I don't want and work on cutting the rims into workable pieces and that will lay flat.


Now I'm cutting the large piece in half. And then will cut from there into smaller workable tiles. 


And now I cut right under the pattern to remove the curve and tidy up the edges.


Above you can see the 2 nice cuts along side the ones yet to be cut. See how simple that was?


Now on to cutting out the pretty center of a plate:


Simply do the same thing; in this case I don't care about the rims so I will just cut it away to get down to the center. But if cutting a plate that you also want the rim, then just cut carefully as described above.


Now I've gotten to the heel so I flip the plate over and cut as close to the heel as possible until I reach the point where I can carefully "jump" the heel and trim it away.


Once the heel is removed, trim around to remove rough edges and to even it out for a perfect, or near perfect circle!


And there it is, cut and ready to use!


Please come back tomorrow for Part 3, the final part. I will show how to place your tiles (cut china) apply thinset and get those tiles nice and level!
 Broken China Mosacis (Part 3)

If you are finding these tips helpful, please follow me and tell your friends! Once I've gotten the final post on Broken China Mosaics, I will move on to more Shabby Vintage Talk...Please join me!!


Wednesday, March 28, 2012

Broken China Mosaics (Part 1)

I LOVE vintage china and so it only makes sense that I'd also love creating mosaics. I got started with mosaics about 7 years ago, give or take. In the beginning I would use anything I could find; tiles, glass, general dinnerware. And I used a hammer, omg, yes a hammer to break them up into pieces. That didn't last long however, not once I did lots and lots (and lots) of research and asking questions which lead to discovering the Wheeled Niper:


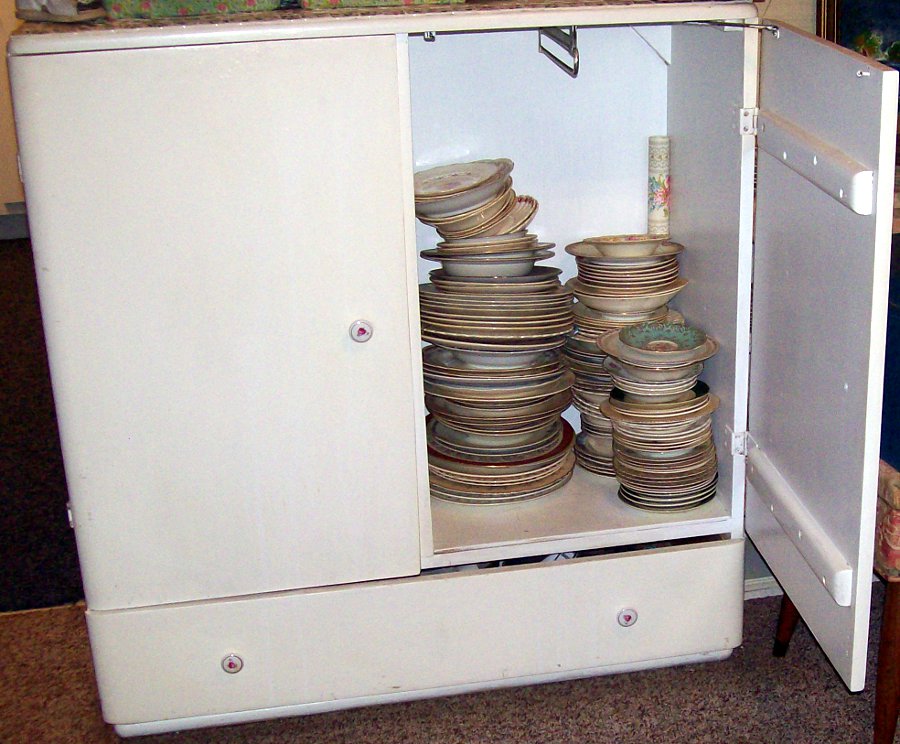
This baby is pure magic!! But more about that later. First I want to start with your first step; acquiring lots and lots of china. Now see, I'm a shabby vintage pink roses kind of girl. And so that is what I hunt for to use in my mosaics. But other people have other taste and so any kind of china can be used. Just beware that today's china, often made in China, is very tough and can be hard to cut. Sometimes a hammer is needed for some of it!! That being said, here are some photos of some of my china:


Now one thing about china mosaics is that very often, your china once cut into pieces, will vary in thickness. This frustrated me beyond belief. I would want to use a piece next to another, yet one would be soooo much thicker that the thinner one would get lost in the grout and/or leave huge deep "grooves" in my work. I just couldn't continue until I found the answer...and then I did...Thinset!! (or Mastic as it is sometimes called) Thinset is basically just tile adhesive often used when installing tiles on bathroom walls. It is very thick and can be used to "build" up your thinner tiles to meet with the thicker ones. It was/is a total lifesaver for me. With this adhesive your finished project will have a wonderful nice level surface; no more "dips and valleys".

To apply my adhesive I use wood craft sticks. But I'm jumping ahead of myself...before you can apply that you need of course to cut your pieces. I use a dish pan to cut into to catch the mess but of course there is still a mess. And I use a small plastic container to hold the amount of  thinset I will need, keeping the orginal container tightly sealed. Anyway, here is a photo of what you need to get started:


I have an Amazon page (see to the right) with links to get you started. Or you can check your local craft store and/or home improvement stores. I will be back tomorrow to get going on the actual cutting process!


Monday, March 26, 2012

Home Sweet Home ~ SpaceCoast, FL

We live in a fairly small yet cozy home. We bought it at the end of 1999, right before the huge housing boom. (Thank God for that!) We were living in a townhouse but when we got our (now deceased) Black Lab, JohnJohn, we figured out that townhouse living was just not for dogs! What brought us to this house was the location (close to the kids' school at the time as well as their friends), the yard and the pool. And although the actual house isn't that big, it still has lots of room; 3 bdrms, 2 baths, large kitchen, living/dining as well as a small den. So it works for us. And it worked for JJ and now works for our puppy Dane as well as the kitty Max. (We have installed dog doors so this house is very pet friendly!)

Anyway, while hanging outside late this afternoon with Dane, I decided to get a few photos of our little world outside. So here we go:

This is the front...there is actually another window to the right and a garage to the left not shown. But at the time of taking the pic I was more interested in getting a shot of the front porch area.

Our Texas Olive Tree...it was more like a twig when we first got it. It has massive pretty white flowers almost all year long. We love this tree, mostly cause we thought it would never grow...it took years to get this way.

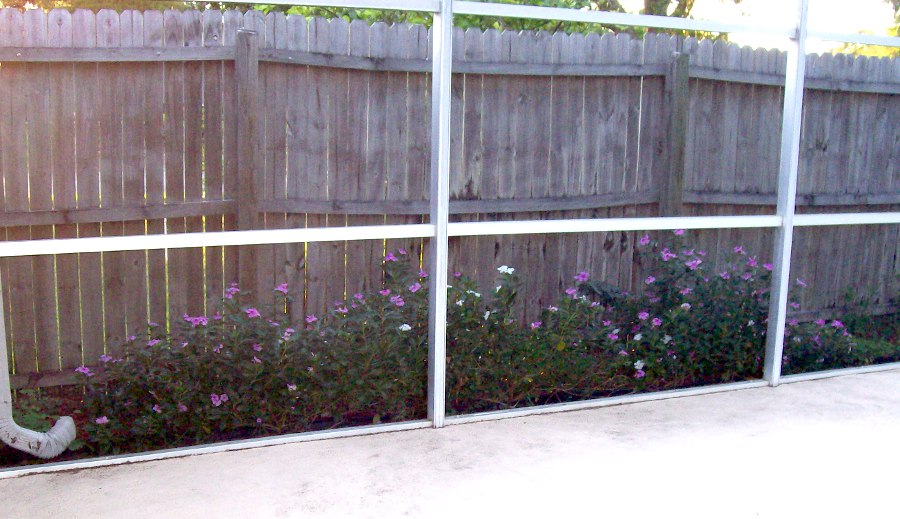
This is an old glider iron bench that was my Mom's. People always want to buy it when I have yard sales. The pink flowers are wild and just appeared on their own...more about that further down.

A mosaic birdbath and birdhouse.


Front Door...notice even more flamingos???

Pool and back privacy fence...and yep, more flamingos!


More of the wild pink flowers.

And this one flower is how it all started. We were walking with JJ on the bike trail near our house a few years ago and I spotted it. Hubby dug it up for me and planted it and now we have pink flowers everywhere!! They are awesome cause they are pink, pretty and seems you can't kill them. Love them!!


Side yard and struggling tangerine tree. The fence around it is to keep Dane out, lol.

Hubby's prized Pomelo or sometimes called called Shaddock tree. There is no fruit on it now but when it does produce, the grapefruit are about 3/4's the size of a basket ball. From the net: "An oversized grapefruit, often with delicate pink segments. The difference between grapefruit in pomelo is that one can eat pomelo plain. Many people who hate grapefruit actually love pomelo. It tastes sweet and sour."

Back yard showing Max the kitty and Dane. Behind Dane is another side yard, not shown here. They both have it made!! (Right after I took this pic Dane chased poor Max behind the shed. Sometimes it is like Tom and Jerry around here.)


So that's all for now...I've taken some photos for my post about Mosaics and will have it ready in the next day or so. Please come back and take a look!!

Oh and one more!! Playing with Dane earlier...he's growing and growing and growing!!