Showing posts with label vintage china. Show all posts

Monday, April 2, 2012

Broken China Mosaics (Part 3)

This post is part 3 and the final post on Broken China Mosaics. If you haven't read them yet, go here Broken China Mosaics (Part 1) and here Broken China Mosaics (Part 2).

Now I'm going to show how I use thinset (also called Mastic) to make the cut china tiles level.

First I use a wood craft stick to scoop out some thinset into a clean plastic container. Then seal up tightly the bucket of thinset so it won't try out. I buy the very large size but many sizes are available on Amazon and/or home improvement stores.

Notice how much thicker the center piece is to the surrounding tiles.


Here is another example with a thick center next to stained glass. Stained glass works great along side broken china and is great for filler. But it is way thinner.


Here is a good example for placement of the tiles. For the most part I lay out my entire (or most) of my design before gluing down. That way I can work with the varying thickness better. But if glued down and I find one misplaced, it's easy enough to pull it up and replace it.


Now apply the thinset using a wood craft stick.


Place the tile with the thinset up close, about the width of the craft stick and work it down to be level with the center tile. If you don't have enough, add more. If you have to much, clean the acess with a toothpick. You don't want to push it down to hard but hard enough that it is set on your surface. Continue this way through the rest of the project!


See how the tile is pretty flush with the center?


And that's how it is done! Pretty easy once you get the hang of it!

Once the tiles are completely glued on, I wait at least 3 days before grouting. Thinset is thick and may take awhile to dry. Test a few pieces to make sure they are on totally dry.

Next is a step that many skip but I recommend:  Use a Dremel with a sanding drum or a diamond bit to smooth the edges of the china pieces. I do this before I grout although sometimes I get so excited to grout that I forget and do it after. Works either way but if it's grouted you just have to be extra careful not to nick the grout.

Time to grout! For the most part I use Sanded grout that I mix myself. But you can also buy Premixed Grout. My color choice is white but that decision is based on the fact my projects are mostly "shabby" and white looks the best.

Okay, I'm going to cheat a bit here and direct you to another site for the grouting directions.

I hope the information here was helpful. Please add any comments and feel free to ask any questions!

And if you haven't already done so, take a look at some of my Mosaics!

Friday, March 30, 2012

Broken China Mosaics (Part 2)

Okay, now it's time to start  cutting the china into pieces with the wheeled nipper.

If you are here for the first time, scroll down to see Broken China Mosaics (Part 1)

The coolest thing about these nippers is that you can cut out the design the way you want it. You have the control that you just don't get with other cutters.


The above photo shows how you can place the wheels in the white space between the patterns.


I've made the first cut (above) as you can see in the bottom of the pan. I cut it large and will continue cutting large cuts until I get off all of the rim. Then I will discard what I don't want and work on cutting the rims into workable pieces and that will lay flat.


Now I'm cutting the large piece in half. And then will cut from there into smaller workable tiles. 


And now I cut right under the pattern to remove the curve and tidy up the edges.


Above you can see the 2 nice cuts along side the ones yet to be cut. See how simple that was?


Now on to cutting out the pretty center of a plate:


Simply do the same thing; in this case I don't care about the rims so I will just cut it away to get down to the center. But if cutting a plate that you also want the rim, then just cut carefully as described above.


Now I've gotten to the heel so I flip the plate over and cut as close to the heel as possible until I reach the point where I can carefully "jump" the heel and trim it away.


Once the heel is removed, trim around to remove rough edges and to even it out for a perfect, or near perfect circle!


And there it is, cut and ready to use!


Please come back tomorrow for Part 3, the final part. I will show how to place your tiles (cut china) apply thinset and get those tiles nice and level!
 Broken China Mosacis (Part 3)

If you are finding these tips helpful, please follow me and tell your friends! Once I've gotten the final post on Broken China Mosaics, I will move on to more Shabby Vintage Talk...Please join me!!


Wednesday, March 28, 2012

Broken China Mosaics (Part 1)

I LOVE vintage china and so it only makes sense that I'd also love creating mosaics. I got started with mosaics about 7 years ago, give or take. In the beginning I would use anything I could find; tiles, glass, general dinnerware. And I used a hammer, omg, yes a hammer to break them up into pieces. That didn't last long however, not once I did lots and lots (and lots) of research and asking questions which lead to discovering the Wheeled Niper:


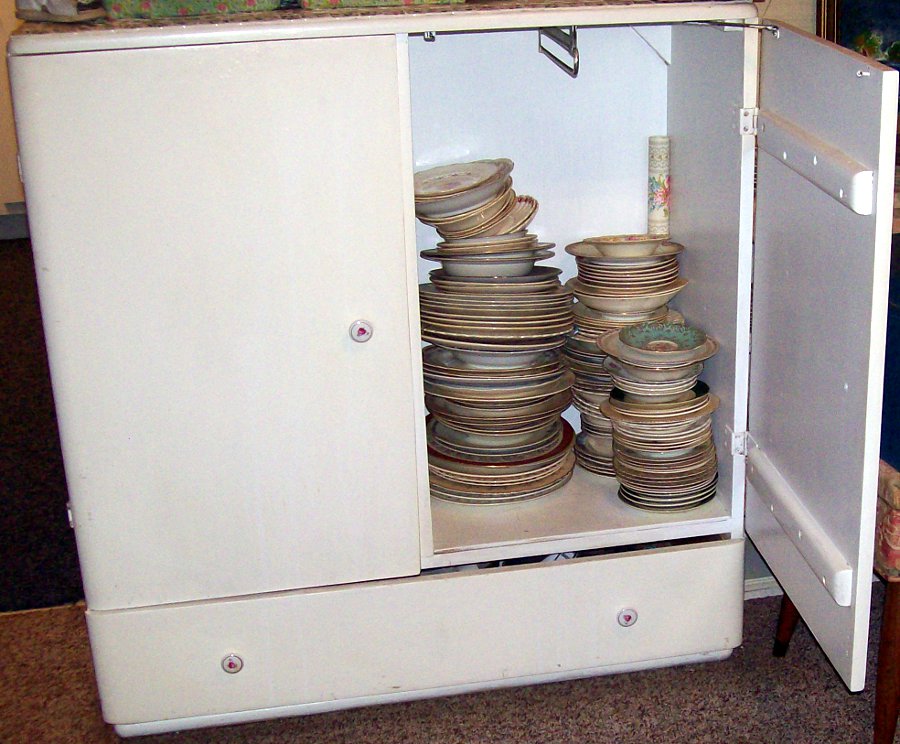
This baby is pure magic!! But more about that later. First I want to start with your first step; acquiring lots and lots of china. Now see, I'm a shabby vintage pink roses kind of girl. And so that is what I hunt for to use in my mosaics. But other people have other taste and so any kind of china can be used. Just beware that today's china, often made in China, is very tough and can be hard to cut. Sometimes a hammer is needed for some of it!! That being said, here are some photos of some of my china:


Now one thing about china mosaics is that very often, your china once cut into pieces, will vary in thickness. This frustrated me beyond belief. I would want to use a piece next to another, yet one would be soooo much thicker that the thinner one would get lost in the grout and/or leave huge deep "grooves" in my work. I just couldn't continue until I found the answer...and then I did...Thinset!! (or Mastic as it is sometimes called) Thinset is basically just tile adhesive often used when installing tiles on bathroom walls. It is very thick and can be used to "build" up your thinner tiles to meet with the thicker ones. It was/is a total lifesaver for me. With this adhesive your finished project will have a wonderful nice level surface; no more "dips and valleys".

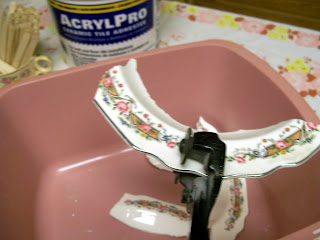
To apply my adhesive I use wood craft sticks. But I'm jumping ahead of myself...before you can apply that you need of course to cut your pieces. I use a dish pan to cut into to catch the mess but of course there is still a mess. And I use a small plastic container to hold the amount of  thinset I will need, keeping the orginal container tightly sealed. Anyway, here is a photo of what you need to get started:


I have an Amazon page (see to the right) with links to get you started. Or you can check your local craft store and/or home improvement stores. I will be back tomorrow to get going on the actual cutting process!


Thursday, March 22, 2012

Vintage China Mosaics

One of my greatest passions is creating Mosaics with vintage broken china. I've taken a little break from it this last year but here are some photos of my creations over the years.
One of my early creations. Sold this one on Ebay.

These birdbaths were special ordered and sold.

This sweet little cabinet was sold on Ebay.

Vintage window that now hangs on my kitchen wall.

Cake Plate that was sold on Ebay.

Chalkboard! The ideas are almost limitless for mosaics.

This is a true FAV! Here's a closeup pic:
This is one of my early creations and it sits in our hallway.

This was a long but fun job. It also sold on Ebay.

Love the Vintage Flamingo plate I used in the center. This also hangs in the kitchen.

So that's it for today but I have lots and lots and lots more to show later. Also I'm going to post some general directions on how to create mosaics along with the tools and supplies needed. Coming soon!!