 |
| Dane in his new bed! You can get it on Amazon...see my "Dog Supplies" link on the right. Happy Saturday everyone! More Mosaice tips coming soon! |

Saturday, March 31, 2012
Dane's New Bed
Friday, March 30, 2012
Broken China Mosaics (Part 2)
Okay, now it's time to start cutting the china into pieces with the wheeled nipper.
If you are here for the first time, scroll down to see Broken China Mosaics (Part 1)
The coolest thing about these nippers is that you can cut out the design the way you want it. You have the control that you just don't get with other cutters.

The above photo shows how you can place the wheels in the white space between the patterns.


Please come back tomorrow for Part 3, the final part. I will show how to place your tiles (cut china) apply thinset and get those tiles nice and level!
Broken China Mosacis (Part 3)
If you are finding these tips helpful, please follow me and tell your friends! Once I've gotten the final post on Broken China Mosaics, I will move on to more Shabby Vintage Talk...Please join me!!
If you are here for the first time, scroll down to see Broken China Mosaics (Part 1)
The coolest thing about these nippers is that you can cut out the design the way you want it. You have the control that you just don't get with other cutters.

The above photo shows how you can place the wheels in the white space between the patterns.


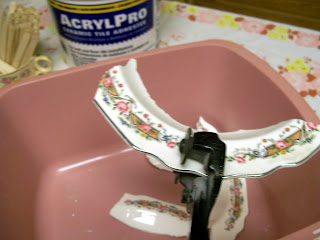
I've made the first cut (above) as you can see in the bottom of the pan. I cut it large and will continue cutting large cuts until I get off all of the rim. Then I will discard what I don't want and work on cutting the rims into workable pieces and that will lay flat.
Now I'm cutting the large piece in half. And then will cut from there into smaller workable tiles.

And now I cut right under the pattern to remove the curve and tidy up the edges.
Above you can see the 2 nice cuts along side the ones yet to be cut. See how simple that was?
Now on to cutting out the pretty center of a plate:

Simply do the same thing; in this case I don't care about the rims so I will just cut it away to get down to the center. But if cutting a plate that you also want the rim, then just cut carefully as described above.


Now I've gotten to the heel so I flip the plate over and cut as close to the heel as possible until I reach the point where I can carefully "jump" the heel and trim it away.


Once the heel is removed, trim around to remove rough edges and to even it out for a perfect, or near perfect circle!

And there it is, cut and ready to use!
Please come back tomorrow for Part 3, the final part. I will show how to place your tiles (cut china) apply thinset and get those tiles nice and level!
Broken China Mosacis (Part 3)
If you are finding these tips helpful, please follow me and tell your friends! Once I've gotten the final post on Broken China Mosaics, I will move on to more Shabby Vintage Talk...Please join me!!
Thursday, March 29, 2012
Random Stuff
I have had a very busy day and so no time to continue on with my Mosaics Tips...but I will be back at it tomorrow for sure.
In the meantime, I want to share a link:

If you are local, go and visit!! They have some really great stuff and prices are very reasonable. And now on the 1st Saturday of every month, they have their "Fancy Flea & Farmers Market" from 8am-2pm. Check it out!
Another link I want to share:
Quality Paperback Book Club
http://qpb.extole.com/a/clk/S84BW
If you love to read, I really suggest to join this club. (and yes, I get free books if you do; a win win for you and me!) When you join you get 4 books for only a dollar each. And then you can buy another book for just 4.99 so you will have less to buy later. And they have an awesome selection of books and with reviews that help alot in deciding if that book is right for you. The books are paperback but the very high quality "large" size ones. And they have lots and lots of specials, like free shipping, half price books, etc.
I have been reading alot lately since finding this club. And here's how I work it...if I find a book that looks really awesome on their site, but no specials at the time, I just go over to Amazon and find (most of the time) the same book, often used, for a great price. But when they do have specials, I take advantage of them so I can meet my commitment. Either way, both sites have a wish list to keep up with the books you'd like to read in the future. I have found so many books with this club that I would have never known were out there if it wasn't for their site. Check out my link on the right top of this page to see the many books I've read and that I really really enjoyed. And give some thought to joining the book club! Have both sources; QPB and Amazon and get reading!
Until tomorrow!!
Wednesday, March 28, 2012
Broken China Mosaics (Part 1)
I LOVE vintage china and so it only makes sense that I'd also love creating mosaics. I got started with mosaics about 7 years ago, give or take. In the beginning I would use anything I could find; tiles, glass, general dinnerware. And I used a hammer, omg, yes a hammer to break them up into pieces. That didn't last long however, not once I did lots and lots (and lots) of research and asking questions which lead to discovering the Wheeled Niper:


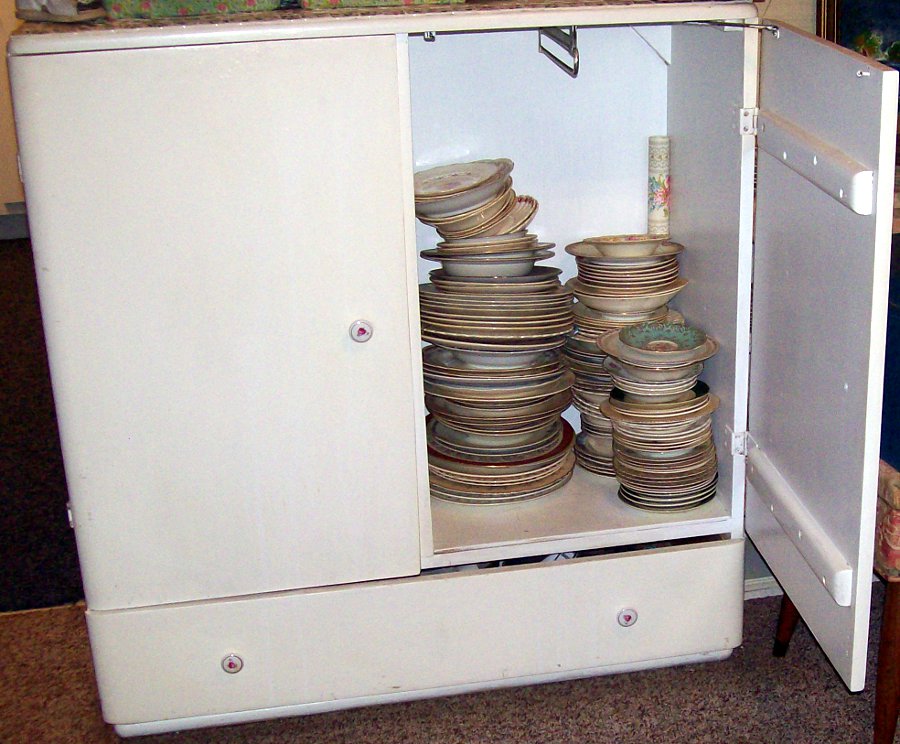
This baby is pure magic!! But more about that later. First I want to start with your first step; acquiring lots and lots of china. Now see, I'm a shabby vintage pink roses kind of girl. And so that is what I hunt for to use in my mosaics. But other people have other taste and so any kind of china can be used. Just beware that today's china, often made in China, is very tough and can be hard to cut. Sometimes a hammer is needed for some of it!! That being said, here are some photos of some of my china:


Now one thing about china mosaics is that very often, your china once cut into pieces, will vary in thickness. This frustrated me beyond belief. I would want to use a piece next to another, yet one would be soooo much thicker that the thinner one would get lost in the grout and/or leave huge deep "grooves" in my work. I just couldn't continue until I found the answer...and then I did...Thinset!! (or Mastic as it is sometimes called) Thinset is basically just tile adhesive often used when installing tiles on bathroom walls. It is very thick and can be used to "build" up your thinner tiles to meet with the thicker ones. It was/is a total lifesaver for me. With this adhesive your finished project will have a wonderful nice level surface; no more "dips and valleys".
To apply my adhesive I use wood craft sticks. But I'm jumping ahead of myself...before you can apply that you need of course to cut your pieces. I use a dish pan to cut into to catch the mess but of course there is still a mess. And I use a small plastic container to hold the amount of thinset I will need, keeping the orginal container tightly sealed. Anyway, here is a photo of what you need to get started:

I have an Amazon page (see to the right) with links to get you started. Or you can check your local craft store and/or home improvement stores. I will be back tomorrow to get going on the actual cutting process!
Monday, March 26, 2012
Home Sweet Home ~ SpaceCoast, FL
We live in a fairly small yet cozy home. We bought it at the end of 1999, right before the huge housing boom. (Thank God for that!) We were living in a townhouse but when we got our (now deceased) Black Lab, JohnJohn, we figured out that townhouse living was just not for dogs! What brought us to this house was the location (close to the kids' school at the time as well as their friends), the yard and the pool. And although the actual house isn't that big, it still has lots of room; 3 bdrms, 2 baths, large kitchen, living/dining as well as a small den. So it works for us. And it worked for JJ and now works for our puppy Dane as well as the kitty Max. (We have installed dog doors so this house is very pet friendly!)
Anyway, while hanging outside late this afternoon with Dane, I decided to get a few photos of our little world outside. So here we go:
Anyway, while hanging outside late this afternoon with Dane, I decided to get a few photos of our little world outside. So here we go:
 |
This is the front...there is actually another window to the right and a garage to the left not shown. But at the time of taking the pic I was more interested in getting a shot of the front porch area.   |
 |
Front Door...notice even more flamingos???      So that's all for now...I've taken some photos for my post about Mosaics and will have it ready in the next day or so. Please come back and take a look!!  |
Sunday, March 25, 2012
Sewing Project Gone Wrong
So a few months ago I decided to pick up cross stitching again. It has been at least 20 years since I've done it. In the course of looking online for patterns I ran across vintage transfers; some that you could print onto transfer paper and also a bunch you can order online (fairly cheap) and that are already on transfer paper. I just love the "days of the week" patterns for dish towels with kittens, puppies, etc. I now have a drawer full of various projects, so much that it's hard for me to get started at all.
Now I love hitting thrift stores and not long ago a picked up a linen tablecloth that I thought would be great to iron on a bunch of my patterns, instead of using just one for a single towel. But then I found this site
http://mytransfers.blogspot.com/
and fell in love with her many many vintage transfers. So I got some transfer paper, ironed them on and began to sew. When I had finished all that I had ironed on so far, (I was still going to add even more) I decided to wash it and see how well the ink you could still see, would come out. Also there was still some excess paper around the pattern that I just assumed would wash off. WRONG!!
 |
| See the paper around the mermaid? Well I had NOT giving up; I was going to figure out how to get it off if it killed me! I had lots and lots of hours in this!! Well our 9 month old puppy Dane, who to this point has always been such a good dog...never ever has he chewed our things...till now.    So I guess that solves the problem of the paper!!! Anybody want a Choc Lab cheap??? I have also added a link to the right for my Amazon Page where you can see lots of Vintage Iron On Transfers as well as other items for your sewing needs. |
Saturday, March 24, 2012
Flamingos!!!
I still haven't gotten around to my mosaic "how to" post but in the meantime, see these photos and understand why my blog is named "Crazy for Flamingos".
 |
| Mosaic flamingo that hangs in the kitchen |
 |
My kitchen windowsill           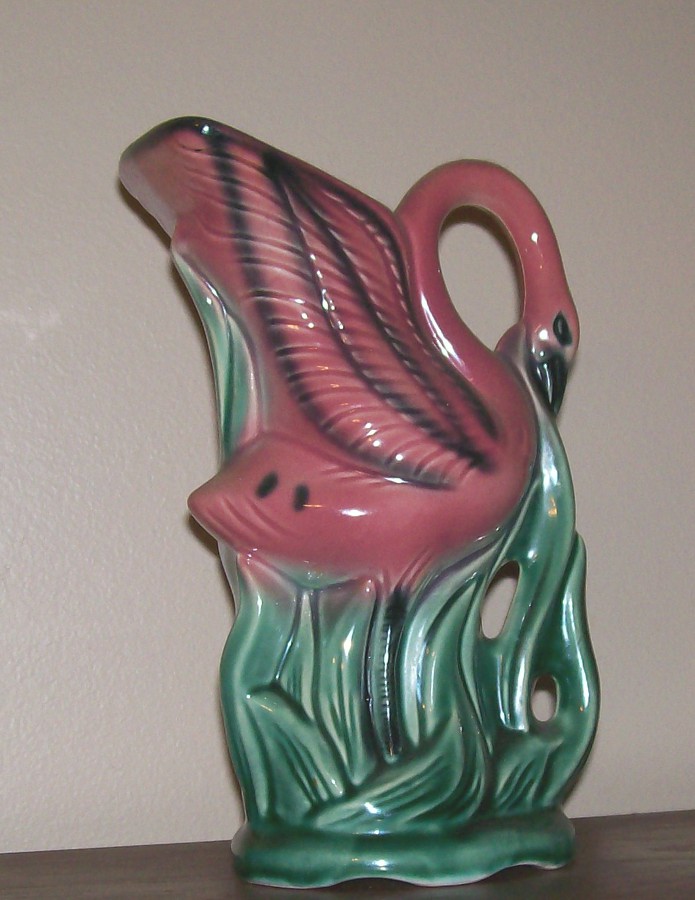 So there it is, my Flamingo Crazy collection. But that's not all; I also have Flamingos in the yard and on the front porch. Will have to get phots of those another day. As of now it seems I am chatting to myself as I've yet to see any traffic. I sure hope that changes as I continue posting. PLEASE, if you have been here, add a comment, even if it's just a big ole "HELLO". Thanks!!
<div id="ScribCode244502989"></div>
|
Subscribe to:
Comments (Atom)